Why Make This Recipe
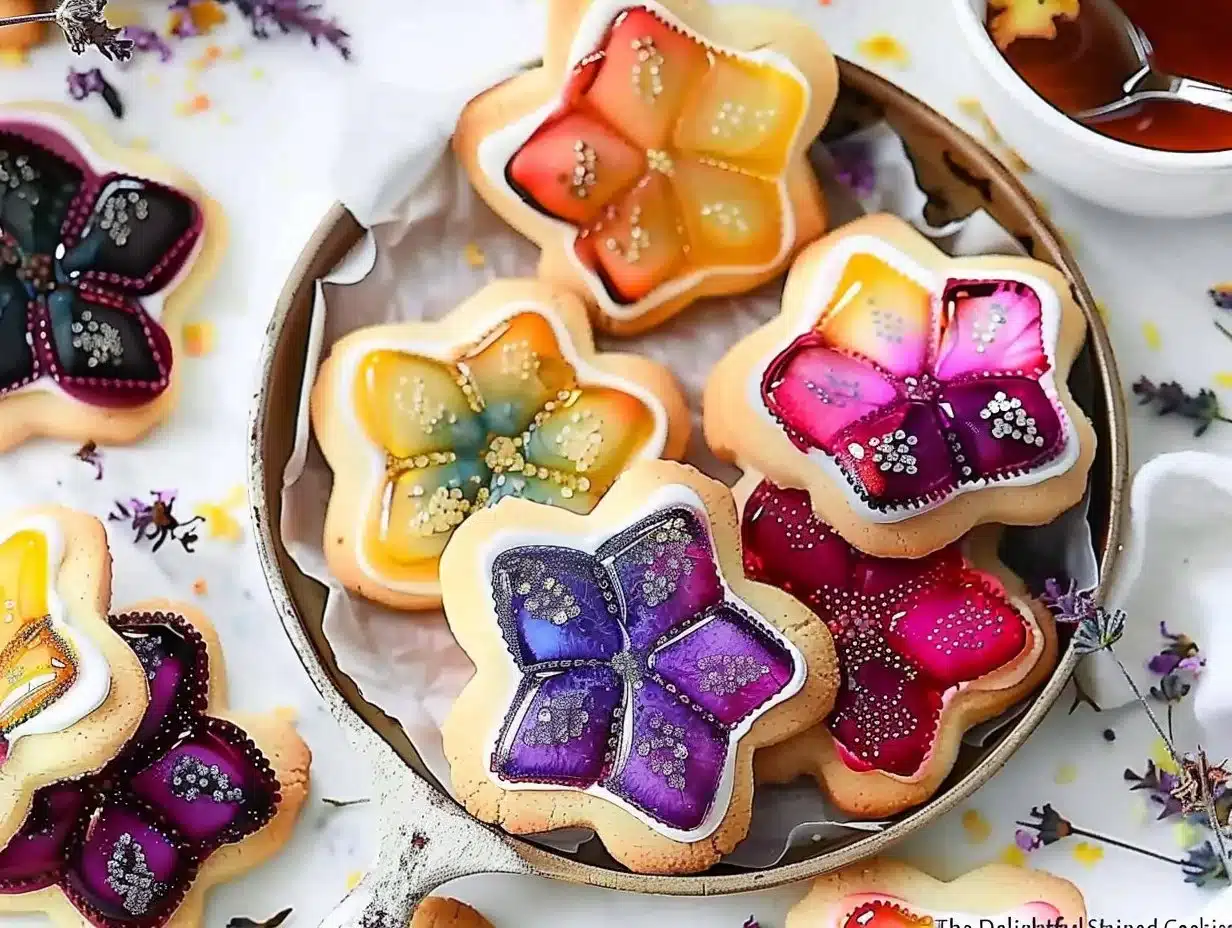
Stained Glass Cookies are a delightful treat that not only taste amazing but also look stunning. They are a fun project to make alone, with family, or with friends. The cookies have a crunchy, buttery flavor and the colorful candies inside create a beautiful visual effect that reminds us of stained glass windows.
Making these cookies is an excellent way to celebrate special occasions such as holidays, birthdays, or even just a regular day that needs a sweet treat. The colorful display of the crushed candies can brighten up any dessert table. Plus, these cookies are easy to customize. You can change the shapes or use different types of candy to fit the theme of your event.
Baking these cookies can also be a wonderful learning experience. If you have kids, you can involve them in the cookie-making process. They can help with mixing, rolling, and choosing the candy, making it a fun family activity. By the end, not only will you have created something delicious, but you’ve also made wonderful memories together.
How to Make The Delightful Stained Glass Cookies
Making The Delightful Stained Glass Cookies is straightforward. The process combines basic baking techniques, making it great for bakers of all skill levels, from beginners to experts. Follow the steps below to create your own beautiful and tasty stained glass cookies.
Ingredients
To make The Delightful Stained Glass Cookies, you will need the following ingredients:
- 1 cup unsalted butter, softened
- 1 cup granulated sugar
- 1 large egg
- 1 teaspoon vanilla extract
- 2 1/2 cups all-purpose flour
- 1/2 teaspoon baking powder
- 1/4 teaspoon salt
- Assorted Jolly Ranchers (or hard candies), crushed
Directions
Let’s go through the steps to make these delicious cookies:
Preheat Your Oven: Start by preheating your oven to 350°F (175°C). This ensures that your cookies bake evenly and get that beautiful golden color.
Cream Butter and Sugar: In a large bowl, use a mixer to cream together the softened butter and granulated sugar. Mix them until the mixture is light and fluffy. This step is crucial because it helps to incorporate air into the dough, making your cookies soft and tender.
Add Egg and Vanilla: Next, beat in the egg. Make sure it is mixed well. Then add the vanilla extract. Stir until everything is well combined. The vanilla adds a lovely flavor to the cookies.
Mix Dry Ingredients: In a separate bowl, whisk together the flour, baking powder, and salt. This combination of dry ingredients helps the cookies rise properly while also adding flavor.
Combine Wet and Dry Ingredients: Gradually mix the dry ingredients into the wet mixture. Use a spoon or mixer to combine until the dough is smooth. Be careful not to overmix as this can make the cookies tough.
Roll Out Dough: Take portions of the dough and roll them out to about 1/4 inch thick on a floured surface. Using cookie cutters, cut out various shapes for your cookies. Be sure to create holes in the centers of each shape since this is where the candies will go.
Fill with Crushed Candies: Place the cut-out cookies on a baking sheet lined with parchment paper. Fill the holes with the crushed candies. Make sure not to overfill them, as the candies will melt and spread during baking.
Bake Cookies: Bake the cookies in the preheated oven for 8-10 minutes. Keep an eye on them, and remove them when the edges are lightly golden.
Cool Before Enjoying: Once baked, let the cookies cool completely on a wire rack. This will help the melted candy harden and make the cookies easy to handle.
How to Serve The Delightful Stained Glass Cookies
Serving your stained glass cookies can be as fun as making them. You can present them on a large platter or arrange them in a decorative tin. Here are some ideas for serving your cookies:
As a Standalone Dessert: Simply place the cookies on a plate and enjoy them as a sweet snack.
For Special Events: If you are celebrating a party or holiday, arrange them on a festive platter. Use colorful napkins to brighten up the table.
Gift them: These cookies make great gifts! You can package them in a clear bag tied with a ribbon, making a lovely gift for friends or family.
Encouraging guests to admire the beautiful colors of the cookies can also enhance the experience. The vibrant candies will attract attention, making them a talking point at any gathering.
How to Store The Delightful Stained Glass Cookies
Storing your stained glass cookies properly will help keep them fresh for longer. Here are some tips on how to store them:
Room Temperature: Store the cookies in an airtight container at room temperature. This keeps them soft and prevents them from becoming stale.
Refrigerator Storage: If you live in a warm climate, consider putting the cookies in the refrigerator. This helps maintain their freshness but may cause the cookies to become slightly harder.
Freezing: If you want to save them for later, you can freeze them. Place the cookies in a single layer in an airtight container, with parchment paper between layers to prevent sticking. They can last in the freezer for up to three months. Just take them out and let them thaw at room temperature before enjoying.
Tips to Make The Delightful Stained Glass Cookies
Here are some helpful tips to ensure your cookies turn out perfectly:
Use Softened Butter: Make sure your butter is softened, as this helps to create a creamy texture when mixed with sugar.
Choose Your Candies Wisely: You can use different types of hard candies, but consider using candies that melt well, like Jolly Ranchers or Life Savers. This way, you will have colorful and appealing results.
Parchment Paper: Lining your baking sheets with parchment paper prevents sticking. It makes cleanup easier and promotes even baking.
Don’t Overbake: Keep a close eye on the cookies while they bake. They can go from perfectly baked to overbaked quickly, so watch for that light golden edge.
Experiment with Shapes: Use various cookie cutters for different occasions. Hearts for Valentine’s Day, stars for Christmas, or even simple circles for any time!
Variation
If you want to experiment with this recipe, there are a few variations you can try:
- Different Flavor Extracts: You can replace vanilla extract with almond or lemon extract for a twist on flavor.
- Colorful Icing: After the cookies have cooled completely, consider adding a layer of royal icing. It could create an even more festive look and add flavor.
- Other Fillings: Instead of candies, you might try chocolate chips, nuts, or dried fruits for a different spin.
FAQs
How long do stained glass cookies last?
When stored in an airtight container, stained glass cookies can last for about a week at room temperature. If kept in the refrigerator, they may stay fresh for up to two weeks.
Can I use other types of cookies for this recipe?
Yes! You can use any sugar cookie or shortbread recipe as a base. Just make sure the dough is sturdy enough to hold the candy filling without breaking.
What should I do if the candy spills out during baking?
If the candies spill out, don’t worry! It can happen. When they cool, they will harden again. If you want to prevent this from happening, try adding a bit less candy or using a slightly thicker cookie dough.
Baking The Delightful Stained Glass Cookies is fun and rewarding. You create something beautiful and delicious while making lasting memories with family and friends. Enjoy your baking!

Stained Glass Cookies
Ingredients
Method
- Preheat your oven to 350°F (175°C).
- In a large bowl, cream together the softened butter and granulated sugar until light and fluffy.
- Beat in the egg and then add the vanilla extract, mixing until well combined.
- In a separate bowl, whisk together the flour, baking powder, and salt.
- Gradually mix the dry ingredients into the wet mixture until smooth.
- Roll portions of the dough to about 1/4 inch thick on a floured surface and cut out various shapes.
- Create holes in the center of each shape and place them on a baking sheet lined with parchment paper.
- Fill the holes with the crushed candies, being careful not to overfill.
- Bake the cookies in the preheated oven for 8-10 minutes until the edges are lightly golden.
- Cool completely on a wire rack before serving.

