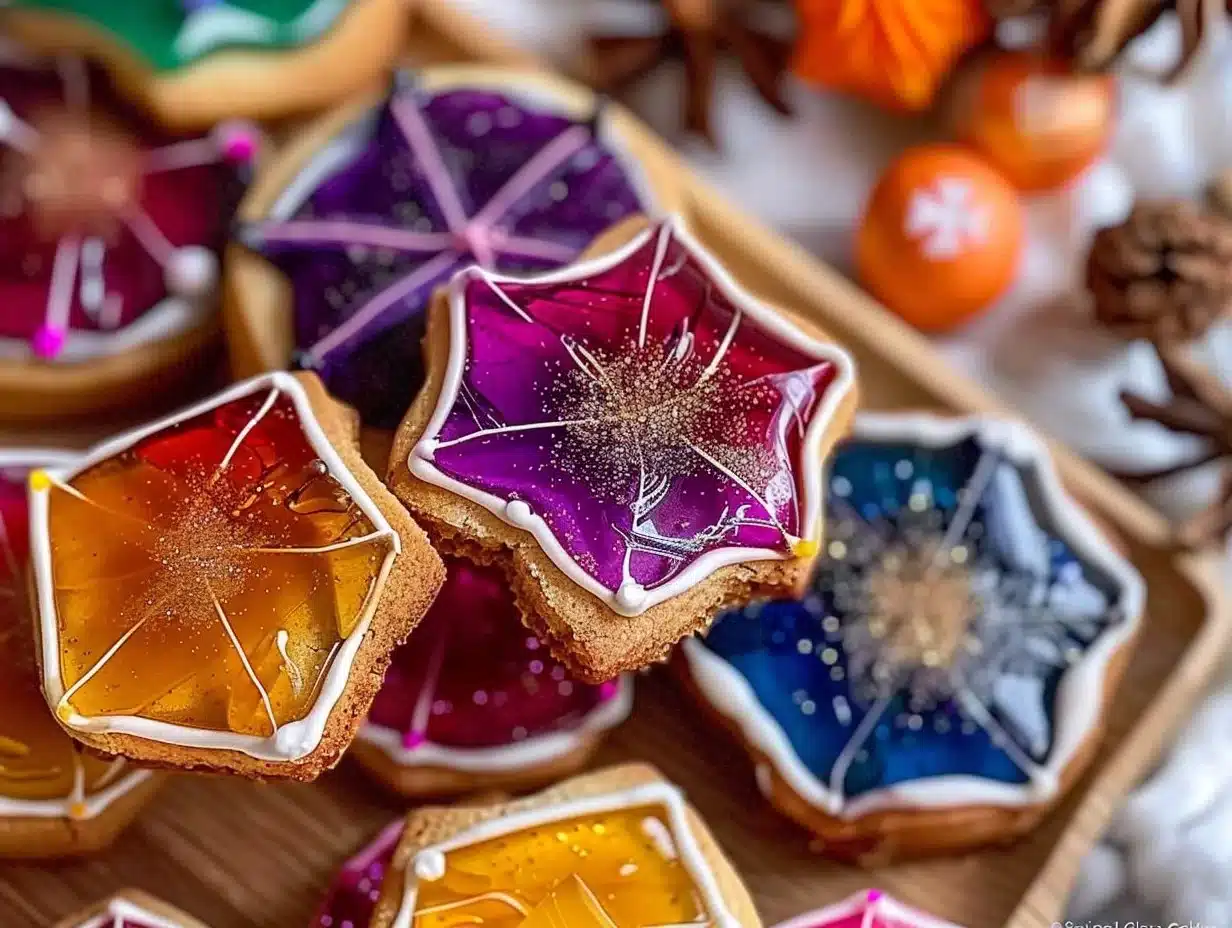
Stained Glass Cookies are a delightful treat that combines the sweetness of traditional cookies with a colorful twist. These cookies are not only tasty, but they also look beautiful when baked. The vibrant hues from the crushed hard candies give these cookies their signature stained glass effect. Whether for holidays, special occasions, or just a fun baking project with kids, Stained Glass Cookies are sure to impress anyone who sees them. They are simple to make and a joy to decorate, making them a perfect recipe to add to your baking repertoire.
Why Make This Recipe
There are many reasons to make Stained Glass Cookies. First, they are visually stunning. The colorful centers mimic stained glass, adding a festive touch to any gathering. They make a wonderful decorative addition to cookie trays during holidays and parties.
Second, baking these cookies can be a fun activity to do with family or friends. Kids love rolling out the dough and cutting out shapes, especially when it comes to filling the centers with crushed candies. It’s a great way to create lovely memories in the kitchen.
Third, these cookies allow for creativity. You can choose any shape you like, whether classic holiday forms like stars and trees or fun shapes like hearts or animals. The cookies can also be customized with different types of hard candies, giving you even more options for colors and flavors.
Finally, Stained Glass Cookies are an easy recipe to follow, even for beginner bakers. With just a few ingredients and simple steps, you’ll find that they are not only achievable but also incredibly rewarding.
How to Make Stained Glass Cookies
Baking Stained Glass Cookies involves several straightforward steps. By following this guide closely, you will ensure that your cookies come out perfectly every time.
Ingredients
- 2 1/2 cups all-purpose flour
- 1 teaspoon baking powder
- 1/2 teaspoon salt
- 1 cup unsalted butter, softened
- 1 cup granulated sugar
- 1 large egg
- 1 teaspoon vanilla extract
- 1 cup crushed hard candies (like Jolly Ranchers)
Directions
Preheat your oven to 350°F (175°C). This is a crucial step, as it helps to create the right environment for your cookies to bake evenly and turn golden brown.
In a medium bowl, mix together the flour, baking powder, and salt. This dry mixture sets the foundation for your cookies. Make sure to combine everything well to ensure even distribution.
In a larger bowl, cream the butter and sugar together until light and fluffy. Use an electric mixer or a whisk. This step incorporates air into the butter, making the cookies soft and tender.
Add the egg and vanilla to the creamed mixture and mix until well combined. Eggs help bind the ingredients together, and vanilla adds a pleasant flavor.
Gradually add the dry ingredients to the wet ingredients and mix just until combined. Avoid over-mixing at this stage to keep your cookies tender. Stop when you no longer see flour.
Roll out the dough to about 1/4 inch thick on a floured surface. Use a rolling pin to get an even thickness, which helps the cookies bake uniformly.
Use cookie cutters to cut out shapes, cutting a smaller shape from the center of each cookie. Gently press down the cookie cutter. If the dough sticks, dust your cutter with a bit of flour.
Fill the cut-out centers with crushed hard candies. Be generous, but don’t overfill, as the candies will melt and spread slightly.
Place the cookies on a baking sheet lined with parchment paper and bake for 10-12 minutes or until lightly golden. The cookies should not be too dark; you want a nice golden hue.
Allow to cool on the baking sheet for a few minutes before transferring to a wire rack to cool completely. This prevents the cookies from breaking, as they need to set before being moved.
How to Serve Stained Glass Cookies
Stained Glass Cookies make a stunning centerpiece when served. You can arrange them on a decorative plate or platter for holidays or parties. For an added touch, sprinkle some powdered sugar on top for a snowy effect. These cookies can also be packaged in clear bags tied with colorful ribbons to make wonderful gifts.
When serving, consider pairing them with tea, coffee, or milk for an enjoyable snack. They can be used as festive treats during holiday celebrations or enjoyed as sweet rewards on regular days.
How to Store Stained Glass Cookies
Stained Glass Cookies can be stored easily to keep them fresh. Place the cooled cookies in an airtight container. It’s best to separate layers with parchment paper to prevent them from sticking together. They can be kept at room temperature for several days.
If you want to save them for a longer time, you can freeze the cookies. Just ensure they are completely cooled before wrapping them tightly in plastic wrap and placing them in a freezer-safe container. When you’re ready to enjoy them, let them thaw at room temperature.
Tips to Make Stained Glass Cookies
Here are some tips to ensure your cookies turn out perfectly:
Use room temperature butter: Softened butter creams better, leading to a fluffier texture.
Don’t overbake: Keep an eye on the cookies in the oven. They should be slightly golden at the edges but still soft.
Custom shapes: Get creative with cookie cutter shapes to match any occasion, from hearts for Valentine’s Day to stars for Christmas.
Experiment with candies: Try different types of hard candies like peppermint or fruit flavors to create unique color and taste combinations.
Chill the dough: If the dough is too soft to roll out, chill it in the fridge for about 30 minutes before working with it.
Variations
There are several fun variations to consider when making Stained Glass Cookies. One option is to add color to the dough itself. You can use food coloring to tint the dough or even cocoa powder for chocolate-flavored stained glass.
Another variation involves changing the flavor profile. Add lemon or almond extract instead of vanilla for a different taste. You can also incorporate small amounts of finely chopped nuts or dried fruit into the cookie dough to add texture and flavor.
FAQs
Can I use other types of candies?
Yes! While Jolly Ranchers are popular, you can use any hard candy that melts well. Just be sure to crush them into small pieces.
Can the cookie dough be made in advance?
Absolutely! You can prepare the dough a day in advance. Just wrap it tightly in plastic wrap and store it in the fridge until you are ready to roll it out and bake.
What can I do if my cookies spread too much while baking?
If your cookies spread too much, it could be due to the dough being too soft or warm. Try chilling the dough for at least 30 minutes before cutting and baking. Additionally, make sure to measure your ingredients accurately.
These Stained Glass Cookies are not only a visual feast but also an enjoyable recipe for bakers of any skill level. Enjoy the process, and most importantly, have fun in the kitchen!

Stained Glass Cookies
Ingredients
Method
- Preheat your oven to 350°F (175°C).
- In a medium bowl, mix together the flour, baking powder, and salt.
- In a larger bowl, cream the butter and sugar together until light and fluffy.
- Add the egg and vanilla to the creamed mixture and mix until well combined.
- Gradually add the dry ingredients to the wet ingredients and mix just until combined.
- Roll out the dough to about 1/4 inch thick on a floured surface.
- Use cookie cutters to cut out shapes, cutting a smaller shape from the center of each cookie.
- Fill the cut-out centers with crushed hard candies.
- Place the cookies on a baking sheet lined with parchment paper and bake for 10-12 minutes or until lightly golden.
- Allow to cool on the baking sheet for a few minutes before transferring to a wire rack to cool completely.

