Why Make This Recipe
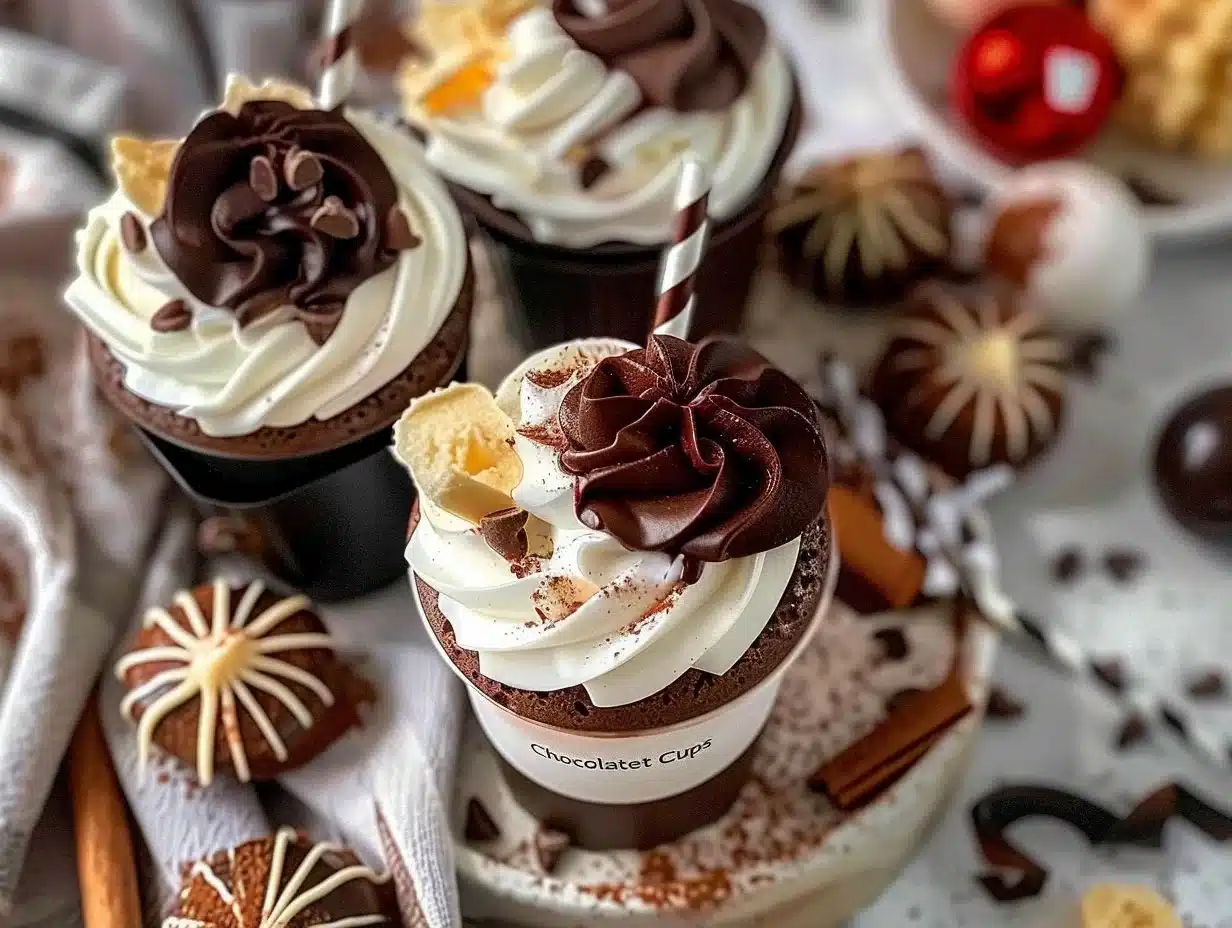
Chocolate Hot Cups are not just a treat; they are a delightful experience. Imagine sipping warm, rich chocolatey goodness from a cup made entirely of chocolate. This recipe is perfect for chilly days when you crave something warm and sweet. The combination of melted milk chocolate and the crunch of candy canes adds a festive touch, making these cups ideal for holiday gatherings or special occasions.
Creating these Chocolate Hot Cups is also a fun activity. Whether you are cooking alone, with friends, or with your family, it encourages creativity. You can customize the cups with your favorite toppings, and everyone can make their unique version. It’s also a great way to impress guests. When you serve these beautiful chocolate cups filled with cocoa, they will surely make everyone smile.
Moreover, this recipe teaches a few valuable cooking techniques, such as melting chocolate smoothly and working with candy. If you are new to cooking or baking, this is a fantastic project to build your skills. Plus, they make fantastic gifts when packaged nicely!
Let’s dive into how you can create these delectable Chocolate Hot Cups.
How To Make Chocolate Hot Cups
Making Chocolate Hot Cups is straightforward and rewarding. Below are the ingredients you will need and the steps to create these delightful treats.
Ingredients
- Disposable cups
- Melted milk chocolate
- Candy canes
- Cocoa powder
- Mini marshmallows
- Granulated sugar
Directions
Melt the Chocolate: Start by melting the chocolate. You can do this using a double boiler or in the microwave. If using a microwave, heat the chocolate in short bursts of 20-30 seconds, stirring in between until it is smooth.
Prepare The Cups: Once the chocolate is melted, take your disposable cups and pour the melted chocolate in, swirling it around to coat the inside evenly. This step is crucial as it forms the walls of your cup. After coating, place the cups in the fridge to harden. You may want to pour another layer of chocolate for extra sturdiness. This will make your cups less likely to break when filled.
Create the Flavor Holder: Carefully remove the chocolate cups from the fridge. Add more melted chocolate inside the cups and insert candy canes into the chocolate. This step not only adds flavor but also gives your cups a beautiful presentation. Once these are set, let the chocolate dry completely.
Add Cocoa Powder and Toppings: Add about 2 teaspoons of cocoa powder to each cup. This addition brings out the rich chocolate flavor. After that, top with mini marshmallows and drizzle some more melted chocolate on top for a fancy touch.
Decorate Your Cups: Take your time and get creative with the decoration. Use melted chocolate to rim the top of the cups, then dip them in granulated sugar for a sparkling finish. This not only looks great but also adds a sweet crunch.
Serve Your Treats: To enjoy your Chocolate Hot Cups, place one in a mug of hot milk. Give it a moment to soften, then stir to mix. Enjoy the warm, soothing flavor of chocolate!
How to Serve Chocolate Hot Cups
Once you have prepared your Chocolate Hot Cups, it’s time to serve them. Here are a few creative serving suggestions:
Pair with Whipped Cream: For an extra indulgent treat, serve the cups with a side of whipped cream. You can either dollop it on top or serve it on the side for dipping.
Add Flavored Syrup: Give your cups a special touch with flavored syrups like caramel or peppermint. Drizzling some syrup over the top adds another layer of flavor.
Offer Toppings: Set up a toppings bar! Provide items like more mini marshmallows, sprinkles, crushed cookies, or nuts. Let your guests top their drinks as they like.
Buddy Up: Serve directly in a tall glass or a festive mug. This adds a visual appeal and makes it more fun to enjoy.
Whatever method you choose, the goal is to highlight the deliciousness of your Chocolate Hot Cups. Present them in a way that makes them irresistible.
How to Store Chocolate Hot Cups
Storing Chocolate Hot Cups properly ensures they stay fresh for later use. Here’s how to do it:
Keep Them Cool and Dry: If you have extras left after serving, store the cups in an airtight container in a cool, dry place. Make sure they don’t come into contact with moisture, as this can cause the chocolate to become sticky or soft.
Refrigeration: These cups can also be stored in the fridge if your climate is warm. Just ensure they are in an airtight container, as chocolate can absorb odors from other foods.
Freezing: If you want to keep them for an extended time, you can freeze your Chocolate Hot Cups. Wrap them carefully with plastic wrap and then in aluminum foil before placing them in a freezer-safe bag. When you’re ready to use them, allow them to thaw in the fridge.
Just keep in mind that the texture of chocolate may change slightly after freezing, so try to consume them within a few weeks for the best taste.
Tips to Make Chocolate Hot Cups
Use Good Quality Chocolate: The taste of your Chocolate Hot Cups depends significantly on the chocolate you choose. Opt for good quality milk chocolate for the best flavor.
Be Careful with the Temperatures: When melting chocolate, avoid overheating. This can cause it to seize, making it unusable. Always go slow and stir often.
Experiment with Flavors: Don’t hesitate to experiment! Add spices like cinnamon or nutmeg to the chocolate while melting. Flavored extracts like vanilla or almond can also elevate your cups.
Use Different Types of Cups: While disposable cups are handy, you can also use silicone molds or ramekins. Just make sure they are easily removable and suitable for food.
Perfect Your Swirl: Practice makes perfect! When coating the disposable cups, practice swirling to get an even layer of chocolate. It may take a few tries, but it will make a difference in presentation.
Variation
There are many ways you can vary this recipe to suit your taste or occasion. Here are a few ideas:
Dark Chocolate Version: Swap out milk chocolate for dark chocolate. Dark chocolate will give a richer flavor and is a great option for those who prefer less sweetness.
Nutty Crunch: Add crushed nuts, such as almonds or hazelnuts, into the chocolate cups. This adds a wonderful crunch and a different layer of flavor.
Minty Freshness: Crush some peppermint candies instead of candy canes and sprinkle them inside the cups before adding the cocoa powder. This gives a refreshing twist, especially for holiday servings.
FAQs
Can I make these cups ahead of time?
Yes! You can make Chocolate Hot Cups a few days in advance. Just store them in an airtight container to keep them fresh.
Can I use white chocolate instead of milk chocolate?
Absolutely! White chocolate can create a delicious, creamy version of these cups. Just remember, white chocolate is sweeter than milk, so adjust your other ingredients if necessary.
How long can I store Chocolate Hot Cups?
If stored properly, you can keep them in an airtight container at room temperature for a week or in the fridge for up to two weeks. If frozen, they can last for a month or more.
By following the steps and tips outlined above, you can easily create Chocolate Hot Cups that impress your family and friends. They are delicious, fun, and perfect for any gathering. Enjoy your chocolatey creation!

Chocolate Hot Cups
Ingredients
Method
- Melt the chocolate using a double boiler or microwave in short bursts of 20-30 seconds, stirring in between until smooth.
- Pour melted chocolate into disposable cups, swirling to coat the inside evenly. Place in the fridge to harden.
- Add more melted chocolate to the hardened cups and insert crushed candy canes for flavor and presentation. Let set.
- Add 2 teaspoons of cocoa powder to each cup, top with mini marshmallows, and drizzle more melted chocolate on top.
- Decorate by dipping the rim of the cups in melted chocolate, then into granulated sugar for a sweet crunch.
- Serve one cup in a mug of hot milk, stirring to mix and enjoy the warm chocolate flavor.

